
Elevate your DIY manicure with cat eye gel nail polish for a trendy, dynamic look. This guide covers everything from nail prep to achieving the perfect cat eye effect. We’ll walk you through selecting the right tools and products, shaping your nails, applying the base coat, and using a magnet to create that mesmerizing cat eye design. Let’s get started and transform your nails into a stunning masterpiece!
Introduction to Cat Eye Gel Nail Polish
Cat eye gel nail polish is a unique product that contains magnetic particles, creating a shimmering, cat-eye effect when aligned with a magnet. This elegant look, exclusive to cat eye gel polish, is easy to achieve at home with the right tools, adding glamour to nails for any occasion.
Whether for a special event or everyday style, it offers a chic option.

Prepping Your Nails for the Perfect Cat Eye Manicure
Before diving into the exciting part, it’s crucial to prep your nails properly. This step ensures that your cat eye gel polish adheres well and lasts longer. Here’s a detailed guide on how to get your nails ready:
Step 1: Remove Any Existing Polish
Start by removing any old nail polish with a gentle remover. This will give you a clean slate, and the new polish will stick better.
Step 2: Shape Your Nails
Grab a nail file and shape your nails to your liking. Whether you’re into square, round, or almond shapes, just make sure they’re even and smooth.
Step 3: Push Back Your Cuticles
Gently push back your cuticles with a cuticle pusher. This not only makes your nails look longer but also helps keep the polish from lifting around the edges.
Step 4: Buff Your Nails
Give your nails a light buff with a nail buffer. This helps remove any natural oils and creates a slightly rough surface so the polish sticks better.
Step 5: Clean Your Nails
Grab a lint-free wipe, soak it in rubbing alcohol, and give your nails a quick wipe to remove dust and oils. This will ensure that your base coat sticks perfectly.

Selecting the Right Cat Eye Gel Polish
Choosing the right cat eye gel polish is the key to nailing that stunning manicure. Here are some expert tips to help you make a confident selection:
Tip 1: Consider the Color
Cat eye gel polishes come in all sorts of shades, from classic blacks and reds to trendy blues and greens. Pick a colour that matches your style and suits the occasion!
Tip 2: Check the Quality
Not all cat eye gel polishes are the same. Go for high-quality brands with great pigmentation and lasting power. Check out reviews to find a good one!
Tip 3: Ensure Compatibility
Make sure your cat’s eye gel polish works with your UV or LED lamp. Most gel polishes are compatible with both, but it’s always a good idea to double-check.

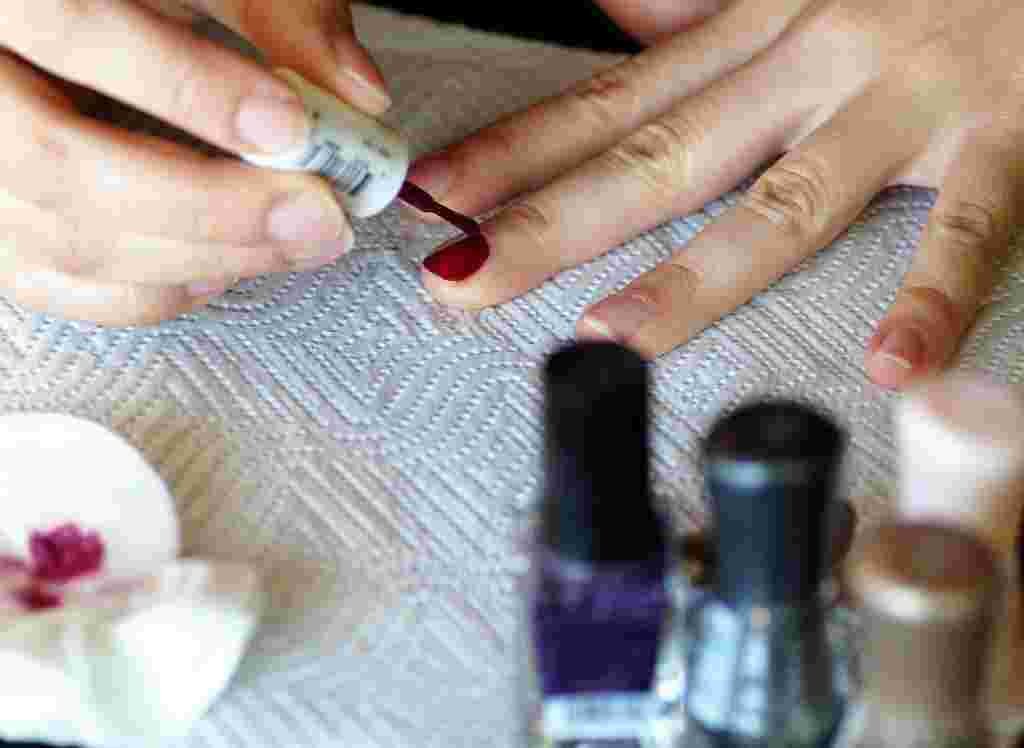
Step-by-Step Guide to Applying Cat Eye Gel Nail Polish
Alright, now that your nails are prepped and you’ve picked the perfect cat eye gel polish, let’s get to applying it. Just follow these steps for a flawless finish:
Apply Base Coat
Before you start with any colour, apply a base coat. This critical step protects your natural nails and makes your manicure last longer.
- Apply a Thin Layer: Start by applying a thin layer of base coat to each nail, covering the entire surface.
- Cure Under Lamp: Pop the base coat under your UV or LED lamp and cure it as per the manufacturer’s instructions. It usually takes around 30–60 seconds.
Choosing and Applying Cat Eye Gel Polish
Now that your base coat is cured, let’s go ahead and apply the cat eye gel polish.
- Shake the Bottle: Give the bottle of cat eye gel polish a gentle roll between your hands to mix those magnetic particles evenly.
- Apply the First Layer: Apply a thin layer of cat-eye gel polish to each nail. Watch out for your skin and cuticles!
- Cure Under Lamp: Pop the first layer under your UV or LED lamp to cure it.
- Apply the Second Layer: Apply a second thin layer of the cat eye gel polish. This is where the magic really happens!

Using the Magnet for the Cat Eye Effect
The best part of this process is creating the cat-eye effect! Here’s how you can do it:
- Hold the Magnet: Before you cure the second layer, hold the magnet close to your nail, 1-2mm away. Feel free to play around with different angles to get some cool effects.
- Wait for 10–15 Seconds: Hold the magnet in place for about 10–15 seconds. You should see the magnetic particles shift, creating that excellent cat-eye effect.
- Cure Under Lamp: Once you’re happy with the look, you can cure the polish under your UV or LED lamp.
Finishing with Top Coat
To finish off your design and give it a lovely shine, just add a top coat.
- Apply a Thin Layer: Apply a thin layer of top coat to each nail, covering the whole surface.
- Cure Under Lamp: Pop the top coat under your UV or LED lamp to cure it.
Clean Up Any Residue
After curing your top coat, you might notice a sticky residue on your nails. Don’t worry; it’s totally normal and super easy to remove.
- Use a Lint-Free Wipe: Grab a lint-free wipe and soak it in some rubbing alcohol.
- Wipe Each Nail: Just give each nail a gentle wipe to get rid of that sticky residue.
Moisturize
Wrap up your manicure by giving your nails and cuticles some moisturizing love.
- Apply Cuticle Oil: Just put a drop of cuticle oil on each nail and gently massage it in.
- Use Hand Cream: Grab your favourite hand cream to keep your hands feeling soft and hydrated.

Tips for a Professional-Looking Cat Eye Manicure
Getting a salon-quality cat eye manicure at home is easier than you think. Here are some tips to nail that professional look:
Tip 1: Take Your Time
If you rush through the process, you’ll likely make mistakes. Take your time with each step to achieve a flawless finish.
Tip 2: Use Thin Layers
Putting on thin layers of polish helps prevent bubbles and makes sure it cures evenly.
Tip 3: Experiment with the Magnet
Be bold and experiment with different angles and distances when using the magnet. Every position can produce an excellent, unique effect.
Tip 4: Keep Your Tools Clean
Make sure your nail tools, including your magnet, are clean before you start. This way, you avoid any contamination and ensure everything goes smoothly.
Maintaining Your Cat Eye Gel Nail Polish
Proper maintenance can help your cat’s eye gel nail polish last longer and look fresh. Here are some tips for maintaining your manicure:
Tip 1: Avoid harmful Chemicals
Exposure to harsh chemicals, such as cleaning products, can damage gel polish. To protect your nails, wear gloves when doing household chores.
Tip 2: Moisturize Regularly
Keep your nails and cuticles healthy by moisturizing them regularly to avoid dryness.
Tip 3: Be Gentle
Avoid using your nails to open packages or scrape off stickers—it can chip and damage your polish!
Tip 4: Touch Up When Needed
If you see any chips or cracks, just touch them up with gel polish and stick your nails under the lamp. This quick fix can make your manicure last longer!
Recommended Cat Eye Gel Polishes
Check out these popular cat eye gel polishes you might want to try:
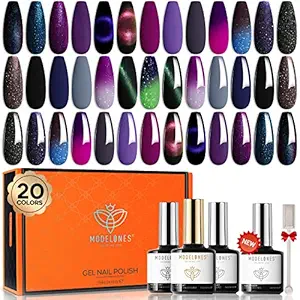
1. Modelones Cat Eye Gel Nail Polish
Modelones has a fantastic range of cat-eye gel polishes in vibrant colours and top-notch quality. They’re super easy to apply and give you that stunning cat-eye effect.
2. Born Pretty Cat Eye Gel Polish:
Born Pretty is famous for its top-notch nail products, and its cat eye gel polish is no different. With so many shades to pick from, you’ll definitely find the perfect colour for your manicure.

3. Vishine Cat Eye Gel Polish:
Vishine’s cat-eye gel polishes are super pigmented and last a long time. They give your nails a stunning cat-eye effect that really makes them pop!

4. Azure Beauty Cat Eye Gel Polish:
Azure Beauty’s cat eye gel polishes are super easy to use and give you that fantastic cat eye effect. Plus, they’re durable and chip-resistant, so you don’t have to worry about them wearing off.

5. Makartt Cat Eye Gel Polish:
Makartt has a fantastic range of cat-eye gel polishes with rich colours and smooth application. Their polishes give you a stunning and long-lasting cat-eye effect.

Follow this guide, and you’ll nail a stunning cat eye gel manicure at home. Whether you’re a DIY fan, a nail care newbie, or a beauty buff, this step-by-step will help you create a manicure you’ll be proud of. Happy polishing!
FAQs
How long does cat eye gel polish last?
Cat eye gel polish can last up to 2–3 weeks if you take good care of it.
1. Can I use any magnets for the cat eye effect?
Nope. To get the best results, use a magnet specifically made for cat eye gel polish.
2. Is it safe to cure my nails under a UV or LED lamp?
Sure, just make sure you follow the instructions and avoid overexposing your nails to the lamp. Also, stick to high-quality gel polish from trusted brands. Remember to take breaks between manicures and always moisturize your hands and cuticles after removing the polish.
3. Can I remove cat eye gel polish like regular nail polish?
Nope. You’ll need to use a gel polish remover and follow the proper process to remove it. Usually, this means soaking your nails in acetone or using foil wraps.
Conclusion and Final Thoughts
Doing cat eye gel nail polish at home is fun and rewarding. With the right tools and some practice, you can achieve a stunning cat-eye effect like a pro. Take your time, follow each step, and experiment with the magnet to create unique designs.
Follow this guide to master the art of cat eye gel nail polish quickly. Give it a shot and enjoy the mesmerizing beauty of your DIY manicure.